Open topic with navigation
Material flow diagram
-
The Material Flow diagram allows you to visually define the flow of materials from source to destination.
-
The schedule will not run in XECUTE if the material flow has not been defined. If a problem exists in the material flow, the material flow element will appear with a red outline, or be coloured red.
-
The flow diagram consists of Nodes that model mine entities and Movement arrows that control the movement of material between the nodes. See Material Movement.
Material flow nodes

|
Pit - source of material to be mined. The materials in the pit should be enabled to have them made available to other nodes, otherwise all material mined will be assigned the pit's default material. |
|

|
Dump - holds waste from mining site.
|
|

|
Stockpile - holding area or warehouse.
|

|
Staged Stockpile - stockpile with one or more configurable piles. |
|

|
Process - processing equipment to split and transform material.
(Includes Sub-Process nodes).
|

|
Wash Plant - a special type of process node displays if Wash Plants are enabled in Site Management.
|
|

|
Product - the final outcome of the mining process.
|

|
Group - control to create groups of nodes. |
Material flow nodes have properties used to model their behaviour. Different nodes model different parts of the mine and each have a set of unique properties, however all nodes a few properties in common.
Node shape and colour
-
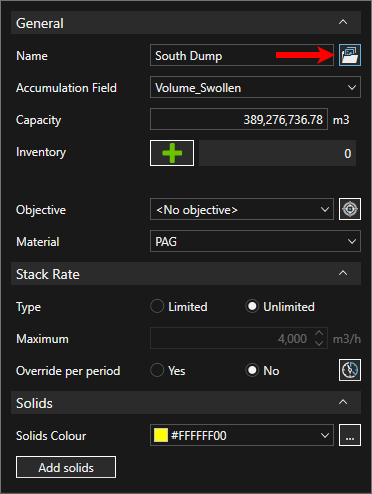
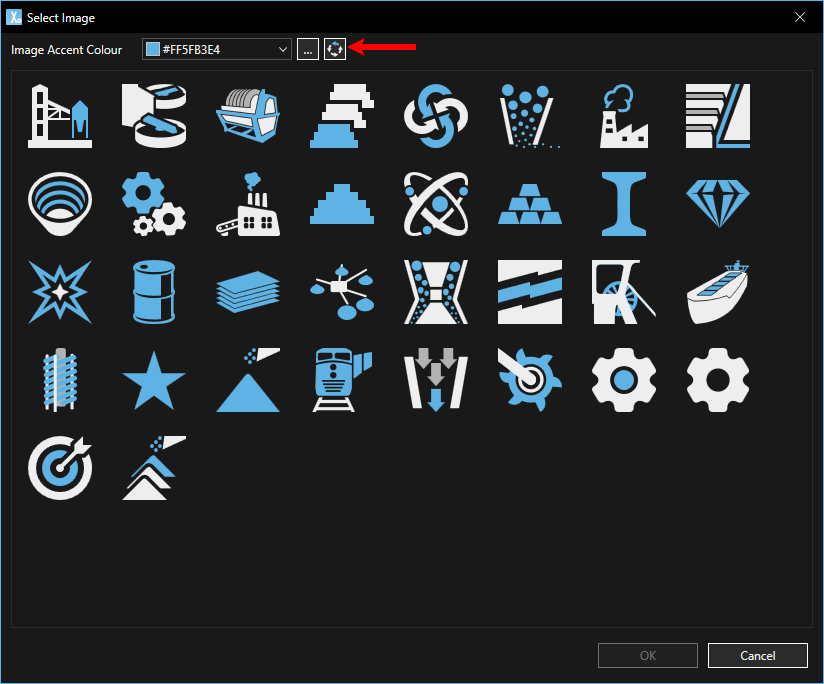
Click on an icon in the Material Flow diagram and click the folder icon to the right of the icon's Name.
-
Click the Accent Colour dropdown and select a new colour. Click the Reset icon to change the icons back to their default state.
Copying Nodes
Nodes within the Material flow can be copied and pasted.
- Select a node, then Ctrl + left-click + drag to copy nodes when the mouse button is released.
- The copied node name will be appended (n).
- All properties of the node will be copied (excluding node movement arrows).
Selecting Nodes
Nodes can be selected by mouse clicks or dragging.
- Ctrl + right-click or Shift + right-click will select a node. The selected nodes will appear with a blue border.
- Left click + drag will create a selection box.
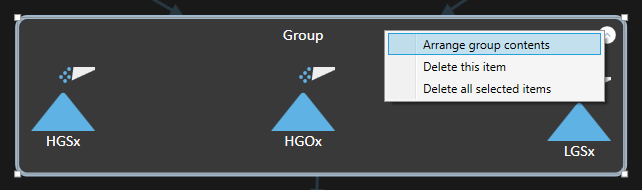
- The selection box has a right-click context menu to delete or group the nodes as shown below.

Grouping nodes
Nodes can be grouped by placing them into a grouping node. Once grouped, the child nodes share the inbound and outbound movement (arrow) properties of the group.
All nodes can be placed into groups except Pit, Product and Process nodes with sub-processes and Group nodes.
There are several ways to group nodes.
Add nodes to a group
- Click the group icon and drag a new group into the material flow.
- Create movements for the group.
- Drag existing or new nodes into the group.
Create a group from existing nodes
- Select one or more nodes. There are several ways to do this (multi-select nodes using Shift-right click, Ctrl-right click on the nodes or left-click and drag to create a selection box).
The selected nodes will appear with a blue border and bounded by a grey selection border
- Right-click in the grey-bordered selection area to bring up a context menu.
- Select Create group from selection to create the group node
This method will remove movements from the nodes when the group is created.
Group considerations
- Group child nodes inherit movements of the group, and nodes within the group do not have movements to other nodes within the group. As far as PO is concerned each child node is treated as if it had movements of the group node.
- Dragging an existing node into the group will remove the movements from that node and it will inherit the group movements.
- Dragging a node out of a group will apply the group level movements to the node.
There is no undo feature in XECUTE Config; consider cloning the site before doing complex grouping edits.
Group controls
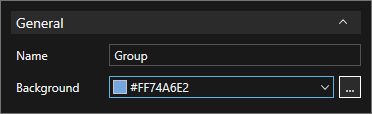
A group has name and background colour properties. Select the group to open the properties box
The group context menu includes an entry to Arrange group contents when more than one child node is present.
Material flow control icons
The Material flow diagram has control icons on the left margin to manage nodes and views.
Material flow movement arrows
To create a movement arrow between two nodes first select the source node and move the mouse cursor to the edge. When the outer border turns green the cursor will change shape to a plus sign and arrow.
At this point click and drag to a destination node to complete the connection. The destination node will show a green border when it is available to connect. Release the mouse button to create the movement arrow.
-
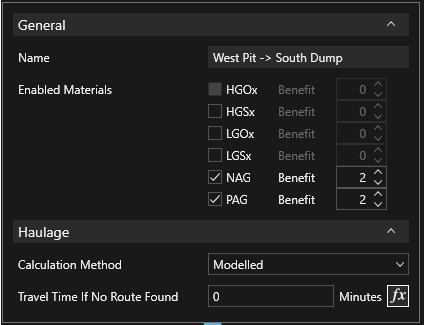
Each movement arrow has a Name automatically generated based on the source and destination node names. The Enabled Materials list is populated from enabled materials at the source node; each material in the list can be selected to allow that material to move along the path to the destination node.
-
A Benefit can be applied to each material to prioritise the movement of material between nodes.
-
A Haulage calculation method can be set for each arrow
-
Modelled - This option is valid if a haulage model is imported into the site and will calculate the travel time between nodes based on the underlying haul network named locations.
- No Haulage - No travel time calculations are performed / reported.
-
Fixed Haulage - A fixed travel time is reported between nodes.
Display controls and filters
Material flow filter
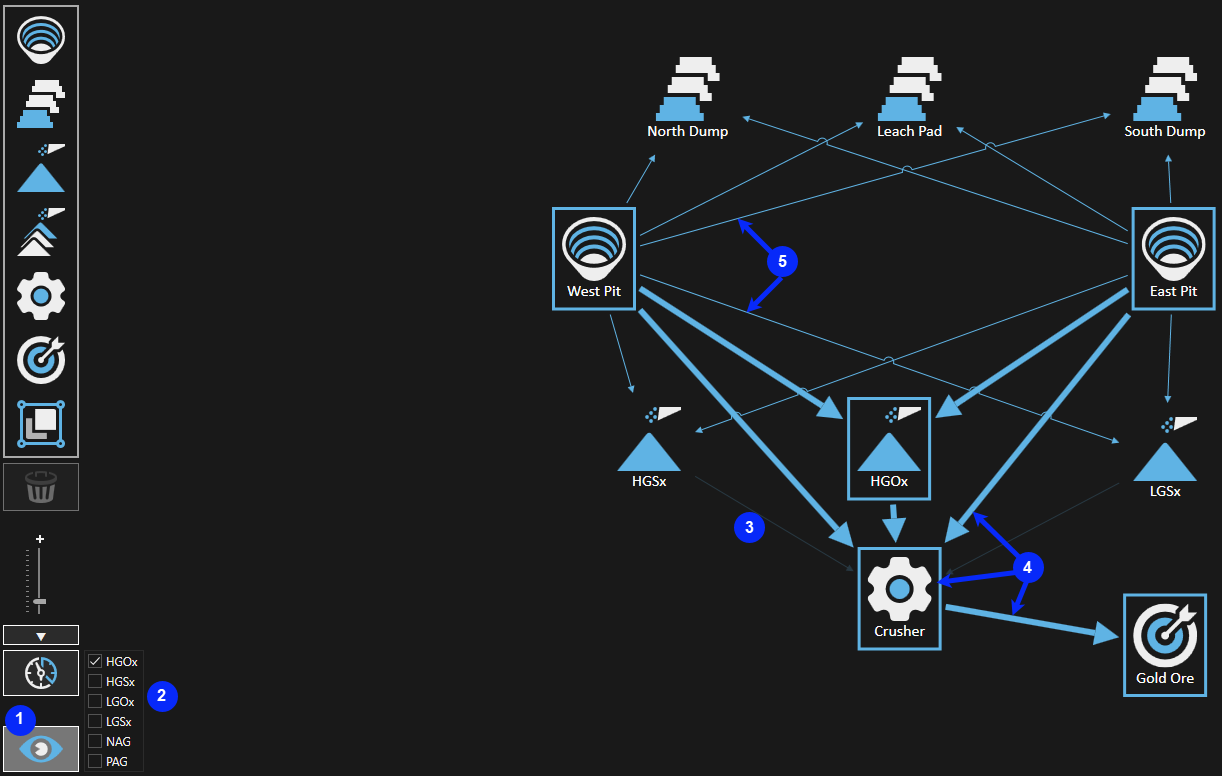
Materials in the diagram can be highlighted to show their material movement arrows. Toggle the Filter icon in the lower left corner to display the list of materials. Select the check box for the materials you want to highlight.
The movement arrows are highlighted to depict the material configuration.
The highlight styles are shown in the example screenshot below. When the filter is enabled you can change the selected material's status on the arrows.
-
Click any enabled (bold) movement arrow to disable the selected filter materials for that movement arrow.
-
Click any disabled (not bold) movement arrow to enable the selected filter materials for that movement arrow.
-
The dimmed movement arrows do not contain the filtered materials and can not be selected or altered while in filter mode.
-
If you disable all materials for a movement arrow it will become invalid and change colour to red.
|
1
|
Material highlight toggle.
|
| 2 |
Materials to highlight. |
| 3 |
Not all selected materials enabled, and CAN'T be.
|
| 4 |
All selected materials enabled. |
| 5 |
Not all selected materials enabled, but CAN be. |
Rehandle Group filter
Rehandle Groups are a construct to link movement arrows and Resources that have been allowed to perform rehandle operations. Resources are assigned a rehandle production rate and can operate on movement arrows that have been grouped into Rehandle Groups.
In Material flow diagram click  to create and display Rehandle Groups.
-
To create a new Rehandle Group click the Green + and enter a name for the group.
-
To remove a Rehandle Group, first select it then click the Red -.
-
To change the colour of the movement arrows associated with the Rehandle Group, click the colour tile.
-
To rename a Rehandle Group, first select the group then click the rename icon.
-
To add movement arrows to a Rehandle Group, first select the group then select one or more highlighted movement arrows. Only movement arrows flowing from stockpiles or staged stockpiles can be assigned, and these arrows will be highlighted when you click the Rehandle Icon.
-
To change the Rehandle Group of an arrow, first select its Rehandle Group name then click the movement arrow to toggle off the current group membership. Select a different Rehandle Group name then click on the arrow to assign the currently selected group to it.
-
To select the Resources to be assigned to the Rehandle Groups see the Resources tab.
-
To set the rehandle operation production rate for the Resource, see Resources > Rehandle Operations.
Objective filter
Objective rules are used by Product Optimiser to help the schedule achieve specific targets. Objective rules can be assign to one or more movement arrows.
-
To create an objective, see Objectives.
-
In the Material flow diagram click  to view the list of configured objective rules.
-
To assign movement arrows to a rule, first select the rule name then click on one or more movement arrows. The selected arrows will appear in bold. Toggle off selection by clicking the arrow again.
-
To enable an objective rule select the check box next to its name. Selecting the check box is the same as setting the Is Active property in the objective rule configuration page.
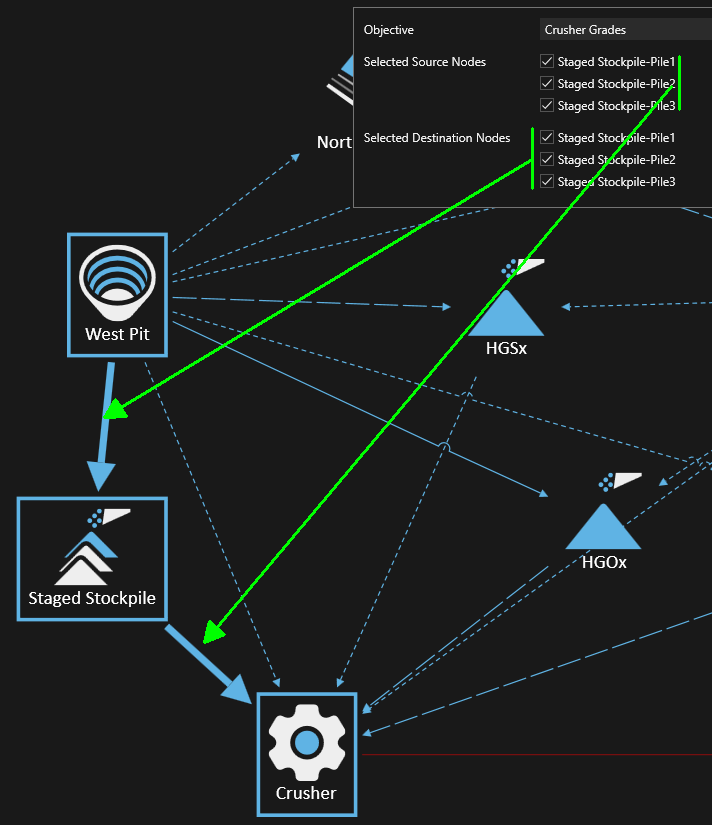
Staged Stockpile objectives
If the material arrow flows into or out of a Staged Stockpile node the objective rule can be enabled or disabled for each pile in the staged stockpile.
For example, a staged stockpile with three piles. Incoming (destination node) and outgoing (source node)