Activity Area Annotations
With annotations on the Activity Areas tab, you can display key schedule or reserve information directly on activity areas in the 3D scene. This is useful for reviewing progress, validating inputs, or communicating plan details visually.
What annotations show
Annotations are text labels anchored to the centroid of each activity area. They can display any combination of:
-
Principal fields (e.g. Volume, Mass, Density)
-
Activity fields (e.g. Activity Area (name), Pit, Mining Level, Mining Status)
-
Custom text and formatting
Each annotation is governed by a rule, which defines what text to show, how it’s styled, and which areas it applies to.
Examples
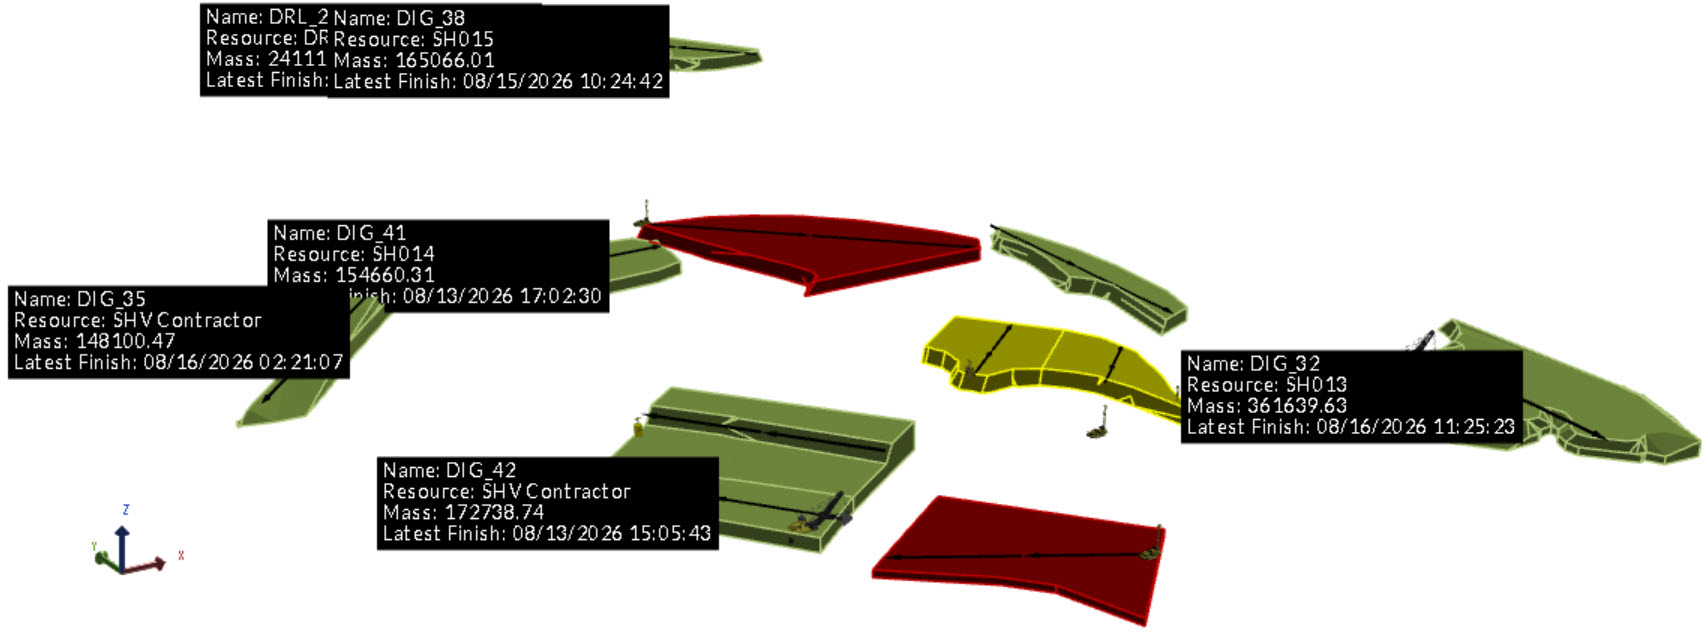
General annotation for areas scheduled before a certain date with high mass
|
Rule |
Property |
Value |
|---|---|---|
|
General Annotation |
Annotation Expression |
ActivityArea + NewLine + Resources + NewLine + CStr(Mass) + NewLine + MiningLevel |
|
Filter Expression |
Last Finish Period Is less than13 Mass Is greater than140,000 |
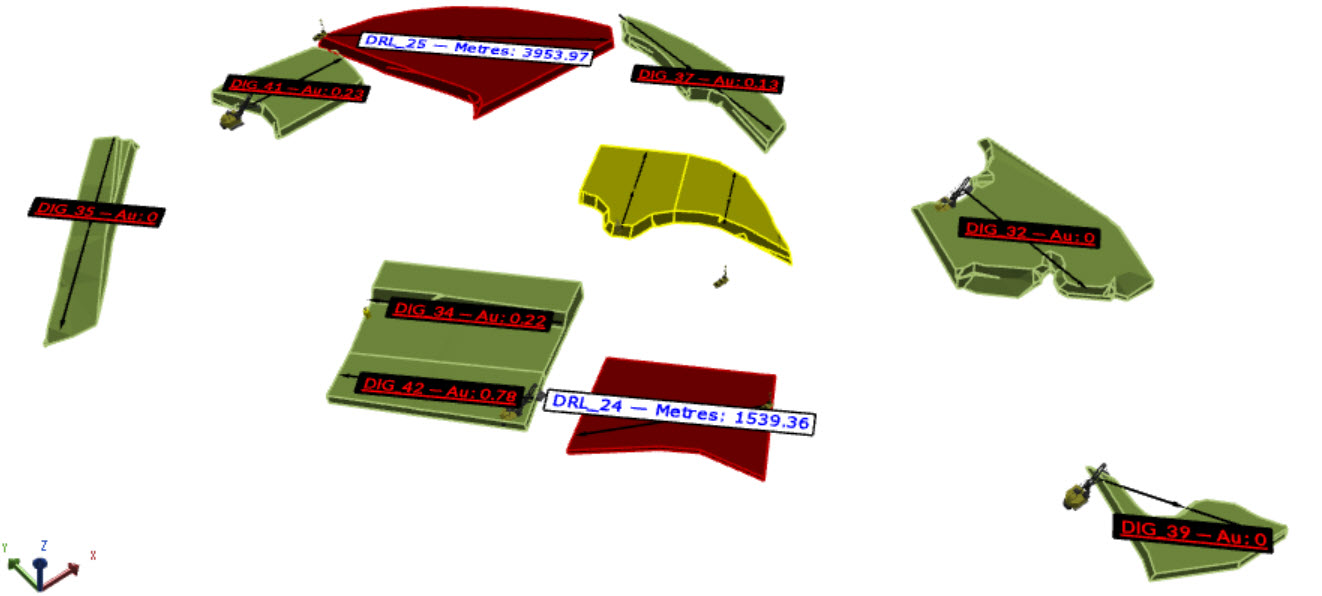
Activity-based annotations
|
Rule |
Property |
Value |
|---|---|---|
|
Drilling Metres |
Annotation Expression |
ActivityArea + " — " + "Metres: " + CStr(Metres) |
|
Filter Expression |
Activity EqualsDrilling |
|
|
Mining Grade |
Annotation Expression |
ActivityArea + " — " + "Au: " + CStr(Au) |
|
Filter Expression |
Activity Equals Mining |
Annotation editor
In Client > Activity Areas tab, on the Annotations ![]() list, select Annotation Rules to open the editor.
list, select Annotation Rules to open the editor.
The editor includes a list of annotation rules, which are sets of conditions that control when and how annotations are displayed. Each rule is a row, and each column represents a configuration of the rule.
Manage rules
Use the options to create and configure rules.
|
Option |
Description |
|---|---|
|
|
Creates a rule. |
|
|
Opens the expression editor, used to create an annotation or filter expression – controlling what’s shown on the annotation and which activity areas are affected. For more information, refer to Properties below. |
|
|
Opens the format editor, used to style the annotations. For more information, refer to Annotation style below. |
|
|
Removes the rule. |
Rule properties
|
Property |
Description |
|---|---|
|
Annotation Expression |
Defines the text shown on each annotated activity area. Expressions can reference:
Use straight quotation marks (" ") for raw text, and the + operator to combine strings. Use functions like CStr() to convert numeric fields to strings. For information about fields and expressions, refer to Field References. |
|
Filter |
A filter expression that determines which activity areas receive the annotation. Filters use logical conditions and can reference any mapped field. Conditions can be grouped and nested for complex logic. If an activity area matches multiple rules, it inherits the annotation from the first applicable rule. Use the Filter Editor to build expressions. For more information, refer to Build filter expressions. |
Annotation style
Each rule also defines styling options, including font, size, alignment, angle, text and background colour, and whether the annotation scales with zoom level.
|
Text |
|
|
Font |
Defines the font used for the annotation text. |
|
Style |
Applies
Bold, Italic, Underline, or |
|
Size |
Sets the size of the annotation text. |
|
Appearance |
|
|
Horizontal Alignment |
Positions the annotation text box to the Left, Centre, or Right of the activity area. |
|
Vertical Alignment |
Positions the annotation text box to the Top, Middle, or Bottom of the activity area. |
|
Angle |
Sets the rotation angle of the annotation text box. |
|
Text Colour |
Defines the colour of the annotation text. |
|
Background Colour |
Defines the background colour of the annotation box. |
|
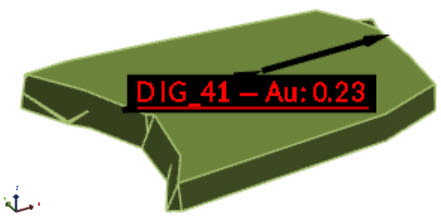
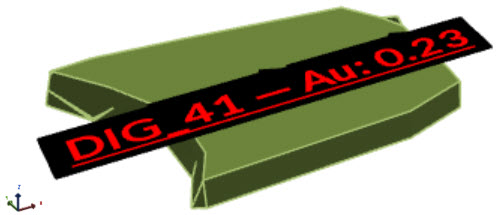
Scale with Zoom Level |
Controls whether the annotation text box scales as you zoom in or out. If enabled, the annotation rotates with the scene and remains anchored to the activity area surface.
Before and after applying the Scale with Zoom Level option |
Create an annotation rule
To create a new rule:
-
Go to Client > Activity Areas tab > Annotations
 .
. -
On the annotations list, select Annotation Rules.
-
Create a rule, then enter a name, define its expressions, and set up a style.
-
Close the dialog.
Apply and view annotations
Once a rule is created, select it on the Annotations ![]() list to apply it.
list to apply it.
Annotations can be toggled on or off per rule, giving you control over what’s displayed in the scene.
Tips for annotation setup
-
Use NewLine in expressions to format multi-line annotations.
-
Combine fields with text for clarity (e.g. "Mass: " + CStr(Mass) + "t").
-
Use filters to apply rules only to specific benches, pits, or activity types.