Design user view
To design a user view:
-
Click User Views on the menu.
-
Select the appropriate view from the list and click Designer
 .
.
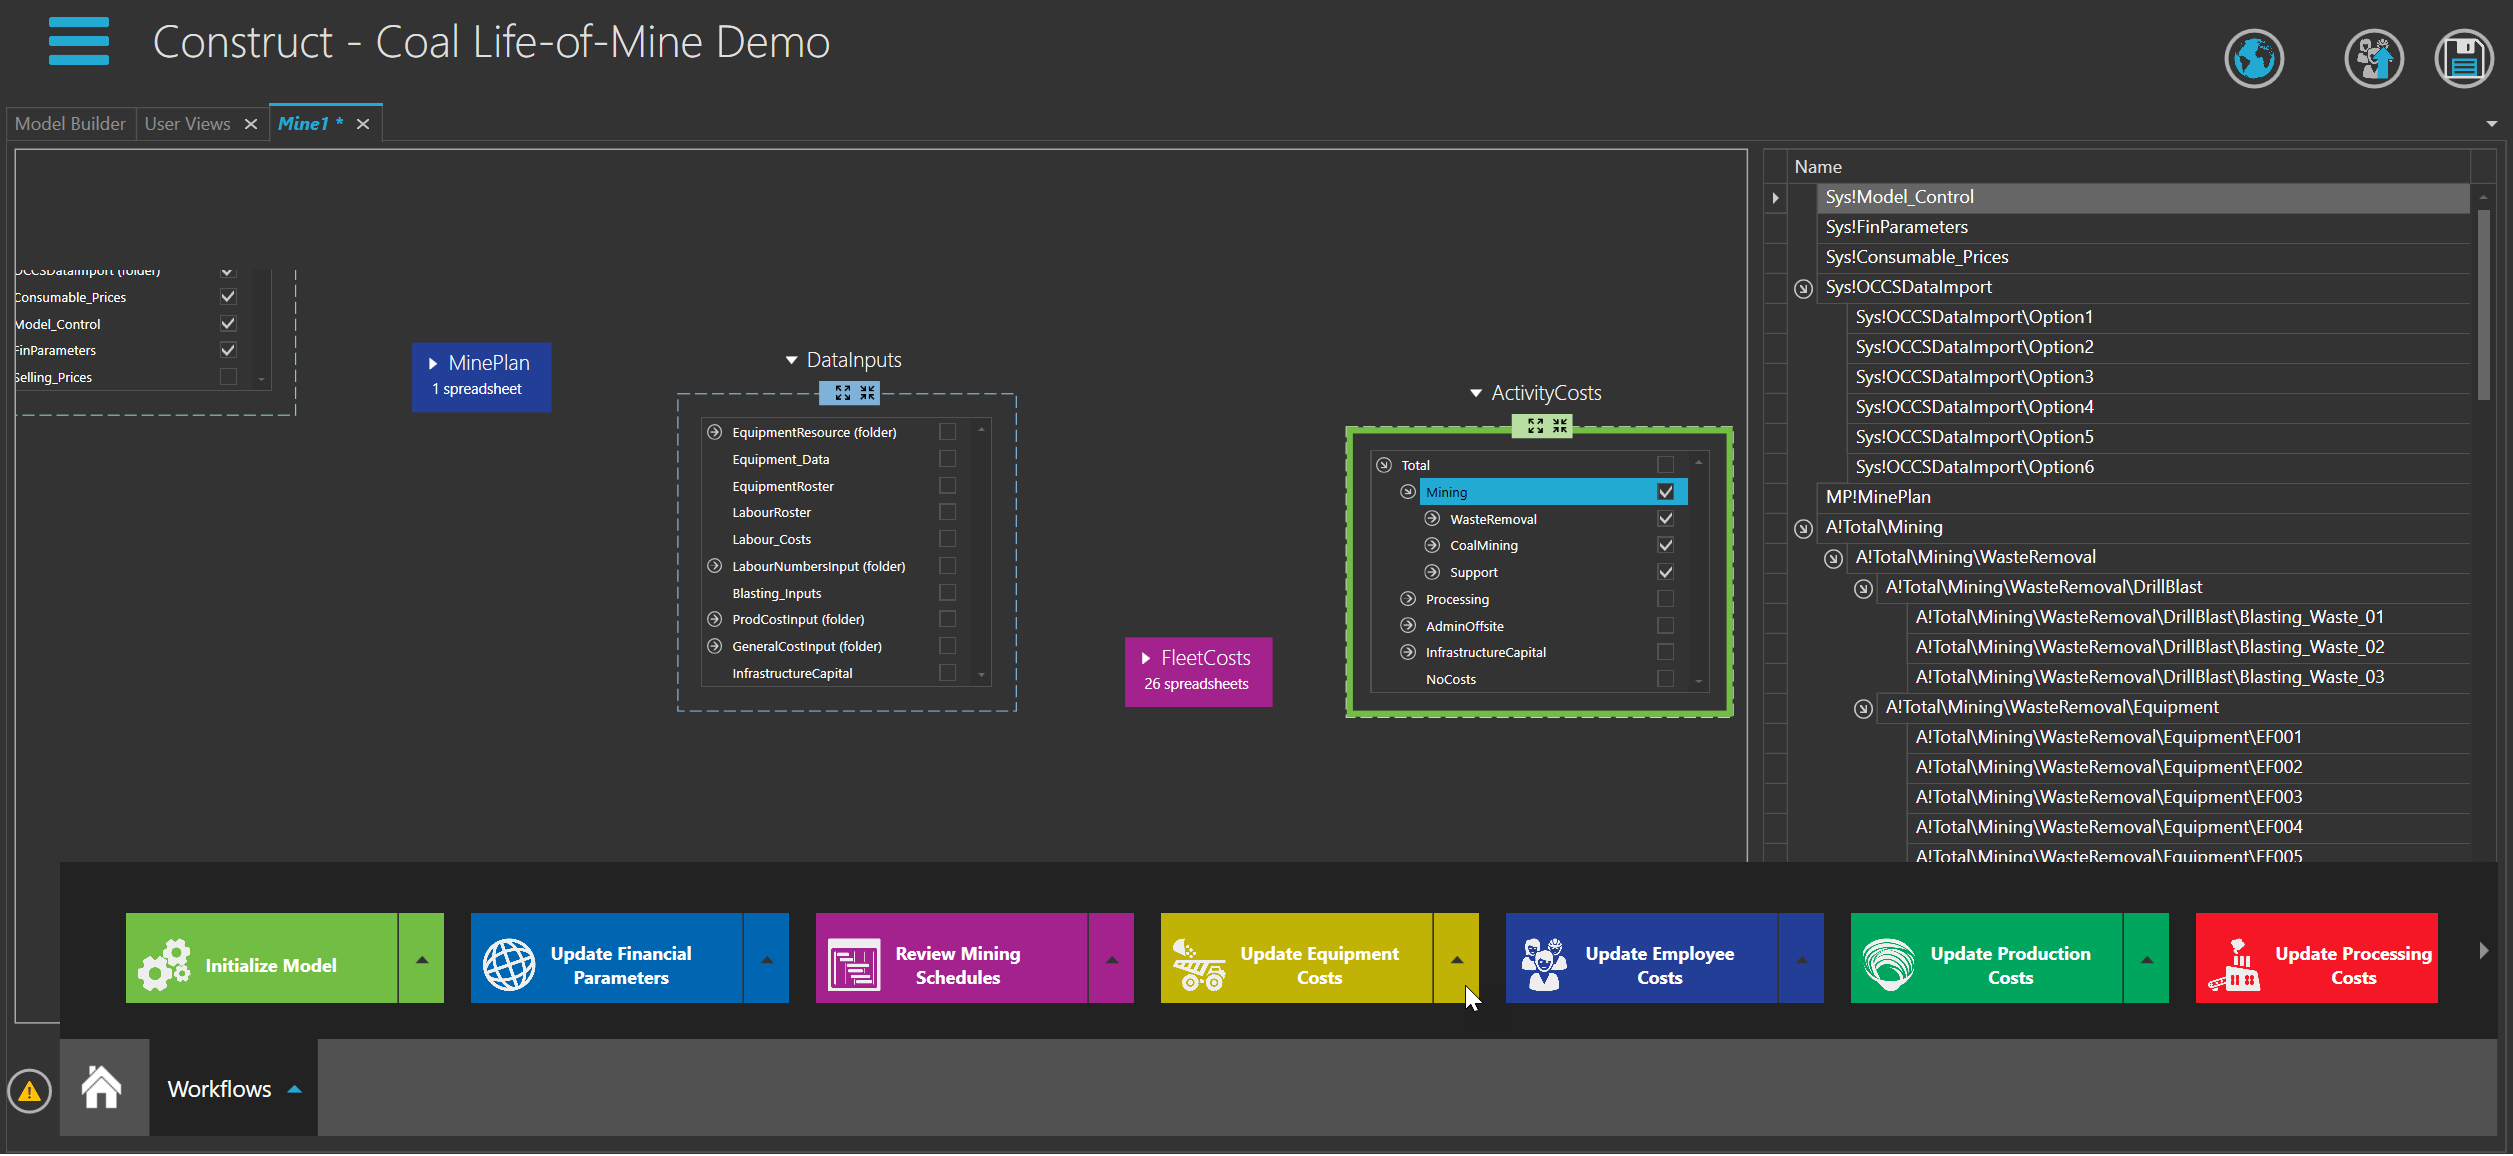
Assign spreadsheets to a user view:
- Expand a Structure in the replica Model Builder canvas.
- Locate the spreadsheet or hierarchical branch you want to assign.
- Select the spreadsheet or branch check box.
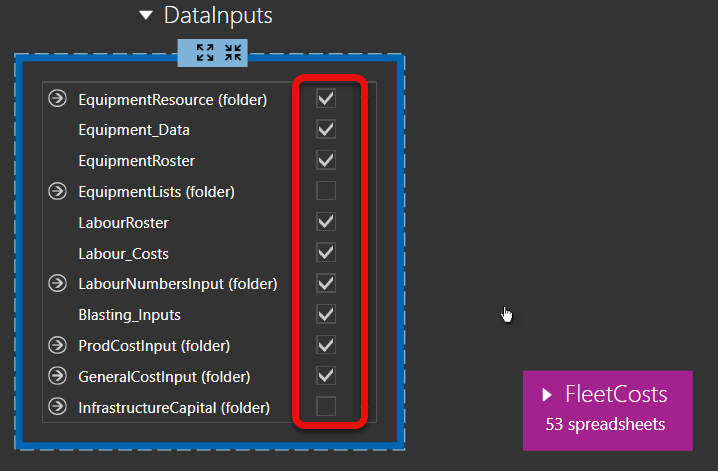
-
The spreadsheet path, along with any additional spreadsheets from the hierarchical branch, displays in the panel on the right of the screen.
To remove a spreadsheet from the user view, clear the checkbox next to that spreadsheet.
To create Workflows in User View:
- In the user view Designer screen, click Workflows.
- Click Add
 .
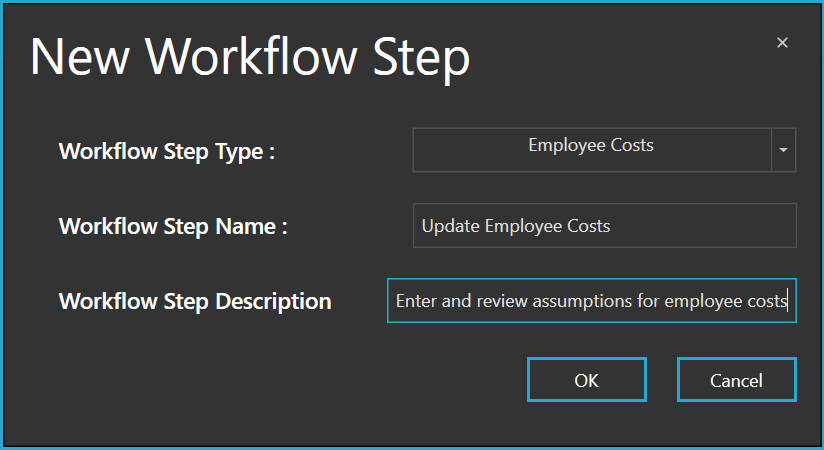
. - Select the Workflow Step Type from the available list.
This will assign an icon to the workflow step.
- Enter the Workflow Step Name.
- Enter the Workflow Step Description.
- Click OK.
Create workflows substep in the user view:
- In the user view Designer screen, click Workflows.
- Click on the arrow in the required Workflow step.
- Click Add .
- Select the Workflow Substep Type from the available list.
- Enter the Workflow Substep Name.
- Enter the Workflow Substep Description.
- Complete additional fields that are dependent on the substep type.
- Click OK.
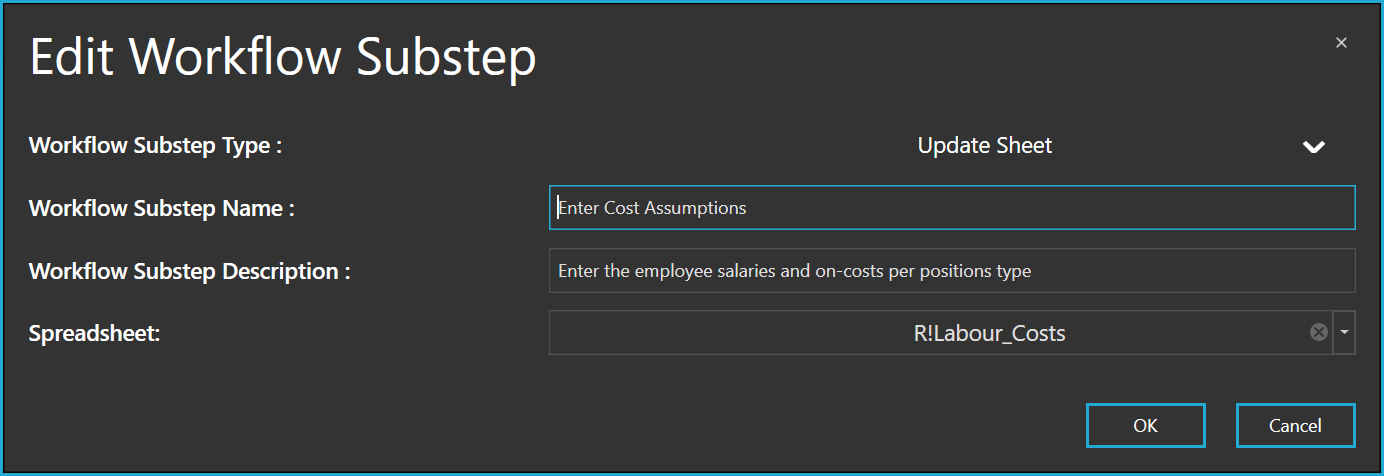
Workflow substep types control the behaviour of the workflow step within the Use mode user interface. The available choices are described in the table below.
Substep Type Behaviour in Use mode Update Sheet Cell Displays the selected spreadsheet and activates the specified cell. Update Sheet Displays the selected spreadsheet and activates the top left cell of that spreadsheet. Update Sheet List Displays a list view of spreadsheets that match the selection criteria, activating the first spreadsheet within that list. Title A simple placeholder on the workflow for information only. Create Spreadsheet Book Not currently available. Execute Data Exchange Displays the data transfer screen for the assigned send or retrieval data transfer routine. Execute Actuals or Budget Retrieval Displays the data transfer screen for the assigned Actuals or Budget data retrieval routine.
Read-only spreadsheets in user views
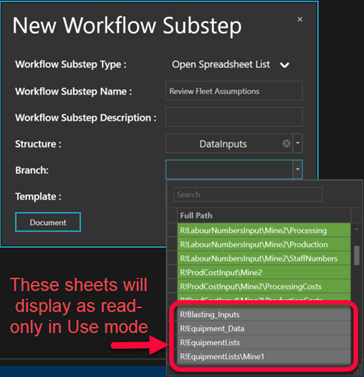
Workflow steps in a user view can contain spreadsheets and spreadsheet lists that are not specifically assigned to the user view. If spreadsheets are not assigned to the user view, they display in Use mode as read-only.
To allocate a read-only spreadsheet to a user view:
-
Create a Workflow Substep.
-
Select Open Spreadsheet or Open Spreadsheet List step type.
-
Select a Structure.
-
In the Branch or Spreadsheet selection box, select the branch or spreadsheet required.
-
Spreadsheets shown with a green background are assigned to the user view and will be opened with edit access in Use mode.
-
Spreadsheets or branches shown with a grey background are not assigned to the user view and will be opened with read-only access in Use mode.
-
-
Complete the remaining fields and click OK.
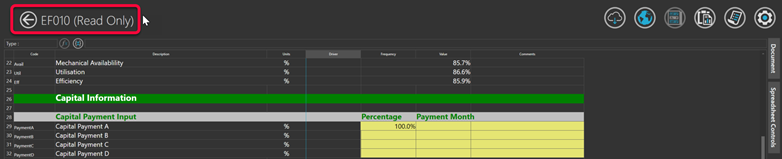
When accessing the workflow step in Use mode, the spreadsheets display as normal with the added Read-Only in the screen header. Changes cannot be made in those spreadsheets.
To delete workflow step or substep:
- Select the workflow step or substep.
- Right-click on the workflow bar and click Delete.
To move a workflow step or substep:
- Select the workflow step or substep.
- Drag the step to where you want it.
To copy a workflow:
You can copy workflow steps and substeps from one user view to another.
- Select the workflow step or substep.
- Right-click on the workflow bar and click Copy.
To paste a workflow:
- Select the workflow step or substep.
- Right-click on the workflow bar and click Paste.