Adding records to the mined out quantities |

|

|
|
Adding records to the mined out quantities |

|

|
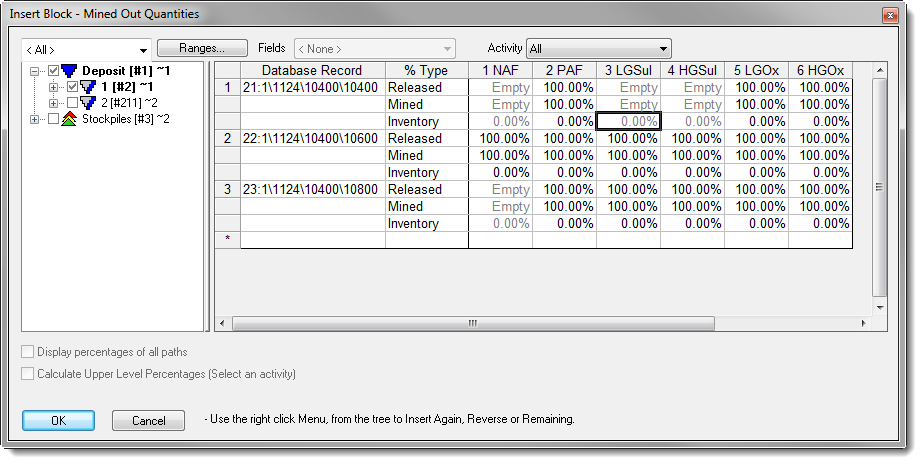
When you first create an XPAC project, there will be no entries in the mined out quantities list. To add a record to the list of mined out quantities, position your cursor anywhere within the current list and click the right mouse button. Select Insert Block from the resulting context menu to display the Insert Block window.

On the right pane of this window XPAC displays the current list of mined out quantities, including any records which have just been inserted. Position your cursor on the record above which you want to insert a block and then point to the required record in the tree structure (described below). The order of records in the mined out quantities list is not important. If there are no records in the list, then you do not need to position your cursor.
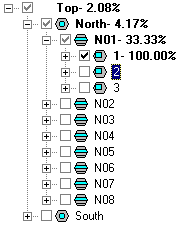
On the left of the Insert Block window is the tree structure of your database, showing which records have already been included in the Mined Out Quantities list. If a record has a black tick on its left, it is included. If an upper level record has a grey tick on its left, one or more of its lower-level records are included in the list.
To add a record to the list, check the open square to the left of the record. XPAC will display a black tick in the square. To expand and collapse the tree structure, click the plus and minus signs to the left of the record name.

If you have the Activity set to All on the Insert Block window and you select a record to add to the list, XPAC will present you with a window from which you can select the activity to be mined. Alternatively, you can specify the activity on the Insert Block window. When you do this, the current list of mined out quantities will be restricted to the selected activity.
When you have finished adding records to the list of mined out quantities, click on the OK button to return to the main window. The new list of mined out quantities will be displayed.