Assign resources to a scenario |

|

|
|
Assign resources to a scenario |

|

|
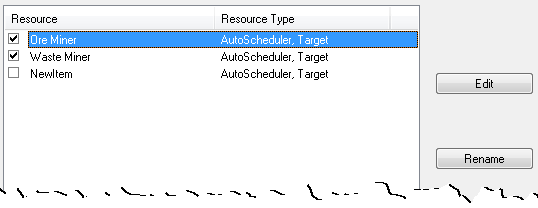
After you have created a new resource, you are able to assign that resource to specific scenarios. Go to the Scenarios tab and open up the tree structure for the required scenario. Click Resources and the full list of resources are displayed on the right pane of the window as shown below.

To assign a resource to a scenario:
| 1. | Select that scenario in the left pane; |
| 2. | Click the Resources item to show the above dialog in the right pane; |
| 3. | Check the box against each resource you want to assign to the scenario. |
A single resource may be assigned to multiple scenarios. In each scenario, it will have the same name, description, resource class, resource colour, animation sounds, resource icon and resource image. All other resource properties can be different for each scenario to which the resource is assigned.
A scenario can have any number of resources assigned to it. When multiple resources are assigned to a scenario, they do not have to have the same resource properties. You can mix the source types (Input Path or AutoScheduler), the resource capacity types (Production Rate or Target) and the destination types (Destination, Dump Path, AutoDump).For example, in an open cut coal schedule scenario, individual waste mining equipment may be set up as Production Resources with defined Input Paths and Dump Paths, while a coal mining fleet may be set up as an AutoScheduler Target Resource utilising the AutoDump facility.