Assigning roster data |

|

|
|
Assigning roster data |

|

|
The Roster Name is the same as the name of the roster template. It can be up to 50 characters long.
The Description should contain a detailed explanation of what the roster represents.
The Number of Weeks in the Roster stores the period over which the roster is repeated. Use the up and down arrows to set the Number of Weeks between 1 and 5. As you increase the number of weeks, tabbed pages will be displayed across the top of the window, each tab representing a week. Where there are two or more weeks, you will also be asked for the Week 1 Start Date.
On the tab for each week you are able to specify whether the roster is the Same as week 1 or whether it is Unique. This is set in the field on the mid right of the roster window, using the drop down list.
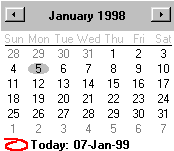
The Week 1 Start Date is required when there are two or more weeks in the roster, so that calendar dates (e.g. time period start dates and roster exceptions) are applied to the correct week of the roster. The date can be selected from a calendar by clicking on the down arrow to the right of this field. To change the month, click on the left or right arrow on this window. Note that the week must start on a Monday.

On the top left of the window, under the heading Set Time As, there are two buttons: Working and Non-Working. They are used to set segments of time in the roster as either working or non working time. Select the relevant minutes and days in the lower part of the roster screen, then click Working or Non-Working as required.
Working |
|
Non-Working |
|
Some minutes Working, some Non-Working |
|
In the normal view, the roster will display the full 24 hours in each day across the page, with each block representing 15 minutes. If more detail is required the view can be expanded so that each block represents one minute. When this is done, only a portion of the 24 hours in the day will be displayed across the page.
To display the time in minutes, click on the Expand to minutes button. If the time is displayed in minutes and you wish to return to the 15 minute display, then click on the Compress button.
The daily work time for each week in the roster is displayed in the table in the lower half of the roster window. To change the work time, highlight the range of minutes that must be changed and then set them as either Working time or Non-Working time.
To the right of the daily roster, the work time for each day in the week is displayed in hours and minutes.
On the lower right of the roster window, the total work time for the week is displayed in hours and minutes.
At the bottom of the roster window, the start and end cursor positions are displayed within each day. The start and end times are based on a 24 hour clock. Note that the end time is only updated when you click on a block within the daily roster.
When the roster is compressed, the start and end times are 15 minutes apart and when the roster is expanded, the start and end times are 1 minute apart.