Setting up all calendars |

|

|
|
Setting up all calendars |

|

|
When you create a new scenario, the first item in the structure tree for that scenario is All Calendars. It is here that XPAC stores the calendar database, start date and schedule start period for the scenario.
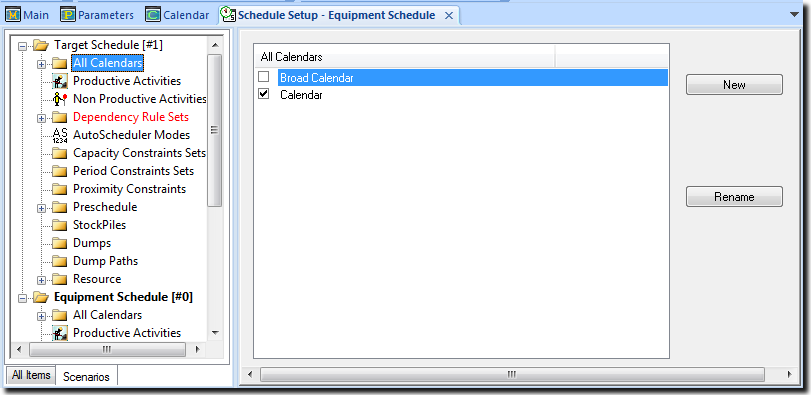
When you click All Calendars in the structure tree, XPAC displays a list of all calendar databases attached to the current project in the right pane of the schedule setup tab. If you have not yet created any calendars, XPAC will display the default calendar (Calendar) in the list. You must allocate one of the calendars to the current scenario. This is done by ticking the box to the left of the calendar name on the right pane of the window. The name of the calendar will then be displayed in the scenario tree structure, underneath All Calendars.
|
Wherever reference is made to a calendar in this scenario, it is this calendar database that is used. |
In the following example window, the default calendar, Calendar, has been assigned to the scenario called Target Schedule.

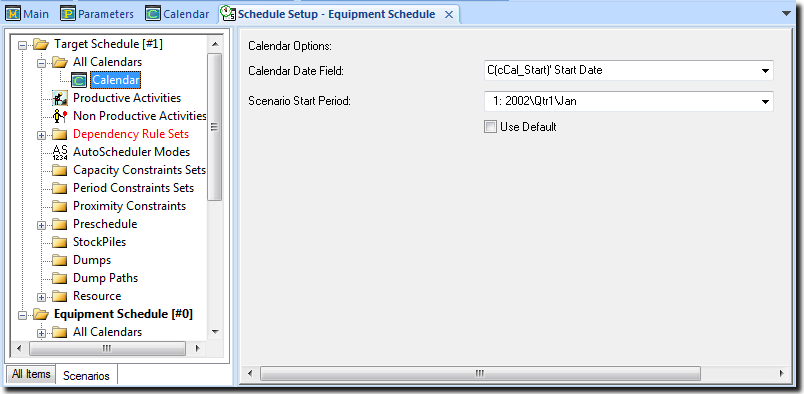
In addition to assigning a calendar to your scenario, you must also specify a calendar date field and the scenario start period for the scenario. To assign this calendar data, click the plus sign to the left of All Calendars, so that the name of the calendar is displayed in the tree structure. Now select the calendar name in the tree structure. XPAC will display the calendar data on the right pane of the tab, as follows.

The Calendar Date Field refers to a data field in the selected calendar which contains the start date for each time period. XPAC uses the start dates to determine the length of the time periods. The start date for one time period is the finish date for the previous time period. Consequently, the last time period in the calendar cannot be used, as its finish date cannot be determined.
Select the Calendar Date Field from the drop down list. Only date type fields from the selected calendar will be displayed in the list.
XPAC uses the Scenario Start Period to specify which time period in the selected calendar the schedule will start in.
Select the Scenario Start Period for the scenario from the drop down list. All time periods in the selected calendar will be displayed in the list. The schedule can start from any time period.
Use this check box to apply the default Calendar Date Field and Schedule Start Period.
When you check box, XPAC will grey out the Calendar Date Field and Schedule Start Period for the current scenario.