|
Resource mapping is only available for schedule reports that include a time report. See Creating an analysis report for more information.
|
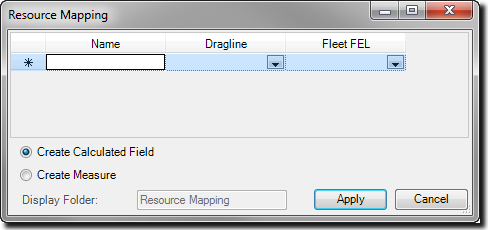
Resource mapping lets you create one field (or measure) that will return different values depending on the resource.
For example, while a resource might spend a certain amount of time on an activity, it will only be productive for a fraction of that time. So many real-life considerations mean that 100% productivity is unlikely. It is common to set up a co-efficient that broadly describes this fraction of time a resource is productive, However, in many cases, this co-efficient will be different for each resource.
Resource mapping lets you set up one field (or measure) that will return a different co-efficient (or other value) for each resource. This means you do not have to perform the same, complex calculation every time you report on a resource; a time-consuming task if you are reporting on multiple resources.
To map resource information to a variable field:
| 1. | Click to open the dialog box:
 |

|
The next columns list the data fields assigned to each resource. There is one column per resource in the database (the image above has only two resources, but in most cases there will be many more available in a functional database). The drop-down lists in each column display all the calendar database fields assigned to a resource.
|
| 3. | Select the database fields that you want to include in your new calculated field. You can leave one or more columns blank. |
| 4. | If required, to create a calculated field or a measure. In most cases, create a calculated field as you can re-use the field in other calculations (see Working with analysis report expressions for more information about calculated fields). Either: |
| a. | Select the radio button; or |
| b. | Select the radio button and type the name of the to displays in the pane to which you want to add the measure. |


