XPAC lets you set the time scale for your report to either:

|
If you set the field to , you will not be able to select the for the report. Instead, the report will use the calendar database structure.
|
Using the Calendar database time scale
If you use the Calendar database structure to define the report's time periods, the report will produce an output with the same structure as the full hierarchical structure of the calendar database. If you set the to or , XPAC bases the schedule results on the lowest level records from the Calendar database.
Creating a new time scale

|
This option is only available when the is set to , or .
|
You can create your own time scale by defining time intervals in a new time scale. If you want to select intervals of even link, you can use this dialog to set the actual time intervals. If you want to select intervals of different lengths, you can use this dialog to set approximate time intervals and then edit those intervals later.
To create a new time scale:

| 3. | Type a name for the new time scale. |
| 4. | Click away from the time scale name. |
| 5. | Select the time scale that you just created. |
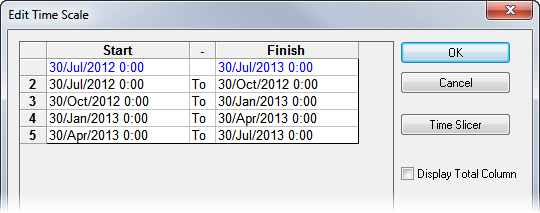
| 6. | Click The window displays. |
| 7. | Specify the new time intervals that you want to use. Select either: |
| a. | to base your time intervals on the calendar database. |
| i. | If required, select the that you want to use from the drop-down list. |

|
This field will be unavailable if only one calendar database exists.
|
| ii. | Select the level of the calendar database that you want to use in the drop-down list. |
| iii. | Select the from the calendar database that you will use to create the dates. |
| iv. | Select the and for your set of intervals. |
| b. | to create your own time slices: |
| i. | Select the and for your set of intervals. |
| ii. | Select the that you want to use. |
| 8. | Click . The window displays a list of time intervals based on your specifications. |


|
While the finish date for one interval does not have to be identical to the start date for the following interval, the schedule results may not appear logical.
|
| 9. | If required, select the check box to include a totals column in the report. |
| 10. | If required, edit a date by clicking in the field and typing the new date (see Date fields for information). |

|
You can create a date after the end date (and push the end date back), but you cannot create a date before the start date.
|
| 11. | If required, you can return to the window at any time by: |
| b. | Double-clicking any field in the table. |
The window redisplays.


