The Edit Spatial Data window |

|

|
|
The Edit Spatial Data window |

|

|
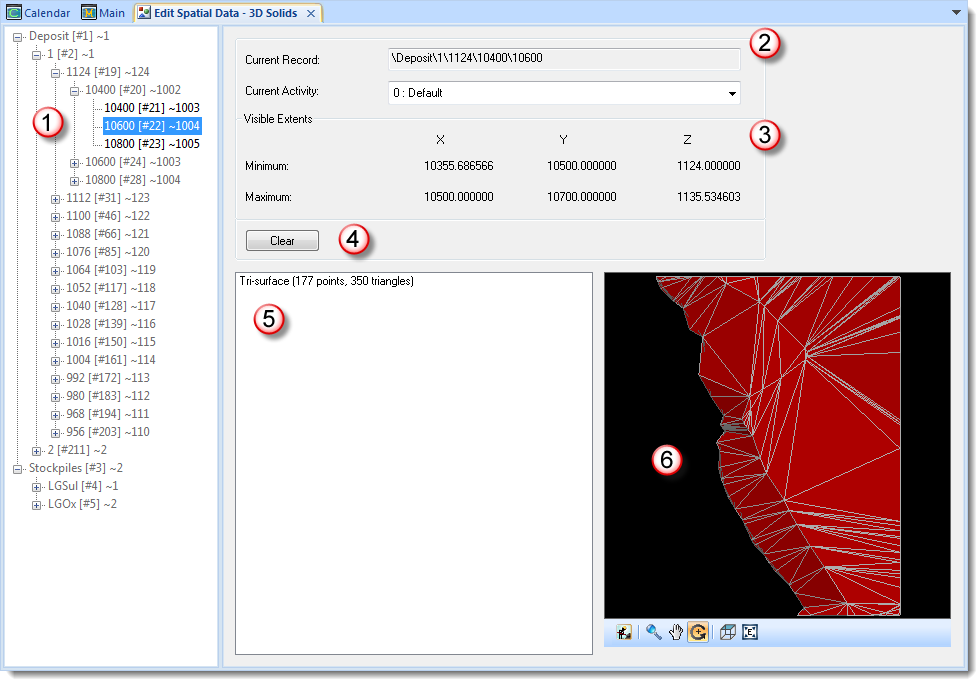
The Edit Spatial Data window lets you view and edit spatial data. To open the window, select View > Spatial Data Sets:

Section |
Area |
Description |
||
|---|---|---|---|---|
|
Record tree |
Displays all records in the database.
|
||
|
Spatial data information |
Displays the selected record (in the record tree) and the selected activity. Use the drop-down list to display data for other activities.
|
||
|
Visible Extents |
Displays the minimum and maximum extents for the preview window.
|
||
|
Clear button |
Lets you delete the spatial data for the selected record and activity. You can also delete spatial data from all activities, all sets or all spatial data for child records (see Deleting spatial data for more information). |
||
|
Spatial data |
Displays coordinates or general information about the selected record and activity.
|
||
|
3D Scene |
Displays a preview of the data for the selected record and activity.
|
If required, you can delete data from records, all activities, all sets and child records so that you can reimport data.
|
Once you have deleted spatial data, you will not be able to undo this action. |
| 1. | In the record tree, right-click the record that you want to delete spatial data for and select Clear Spatial Data. The Clear Spatial Data window displays. |
| 2. | Select the check box of each option that you want to apply: |
| a. | Delete spatial data from all activities. |
| b. | Delete spatial data from all sets. |
| c. | Delete spatial data for child records. |
| 3. | Click OK. |
XPAC deletes the spatial data from selected records as specified.
Simplifying tri-surfaces
The Simplify Tri-Surfaces dialog may be used to reduce the complexity of tri-surfaces without significantly affecting their appearance or the reported volume or surface area of the tri-surfaces. This has several benefits, including:
| o | Reduces memory required for displaying spatial data plots |
| o | Reduces load time of spatial data plots |
| o | Increases the responsiveness of the 3D view |
| o | Improves performance of stage plans |
The dialog allows previewing the effect of the various parameters to ensure an optimum level of simplification. To access it:
| 1. | In the record tree, select the individual record or parent record you wish to simplify. All child records of the select record will be included for processing. |
| 2. | Either: |
| a. | Right-click the record and select Simplify Tri-surfaces…; or, |
| b. | Select the View menu and select Simplify Tri-surfaces… |
| 3. | Select which activities to include for processing. |
| 4. | The Simplify Tri-Surfaces dialog will appear with the spatial data from the selected records and activities loaded into the preview. |
See Simplifying Tri-Surfaces for more information about the Simplify Tri-Surfaces dialog.
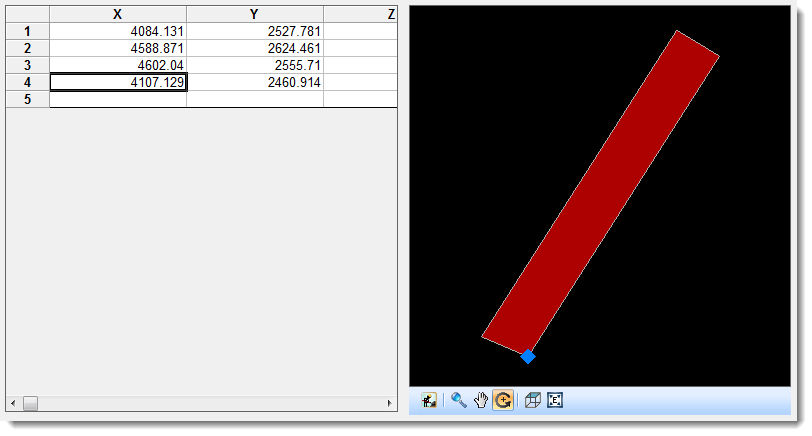
The record information section in the Edit Spatial Data window displays 2D and 3D data differently. For example, 2D (polygon) data displays a set of coordinates that you can edit (if required):

|
Blank rows between coordinates in the data sheet indicate sub-polygons (gaps in the selected records). These are records that have multiple polygons for each activity and data set. XPAC automatically closes each sub-polygon that is not closed. You can use sub-polygons to include and exclude specific areas in a polygon using polygon holes. |
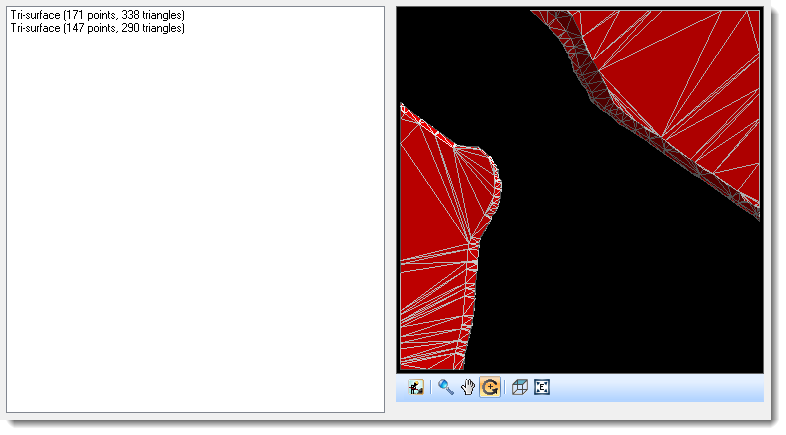
3D data however, displays general information about the selected record, for example:

|
XPAC does not let you edit 3D spatial data information. |
You can use the buttons in the 3D Scene to control the way the preview of the spatial data displays. For example, you can rotate, pan and zoom. The table below describes the buttons available in the 3D Scene:
Button |
Name |
Description |
|---|---|---|
|
Display All Activities |
Displays all activities in the preview window for the selected record. |
|
Lets you zoom in or out in the preview window. |
|
|
Lets you move the preview in any direction without changing the angle or zoom. |
|
|
Lets you rotate the preview to view it from other angles. |
|
|
Returns the preview to a top (plan) view. |
|
|
Fits the whole spatial data plot neatly inside the preview window. |